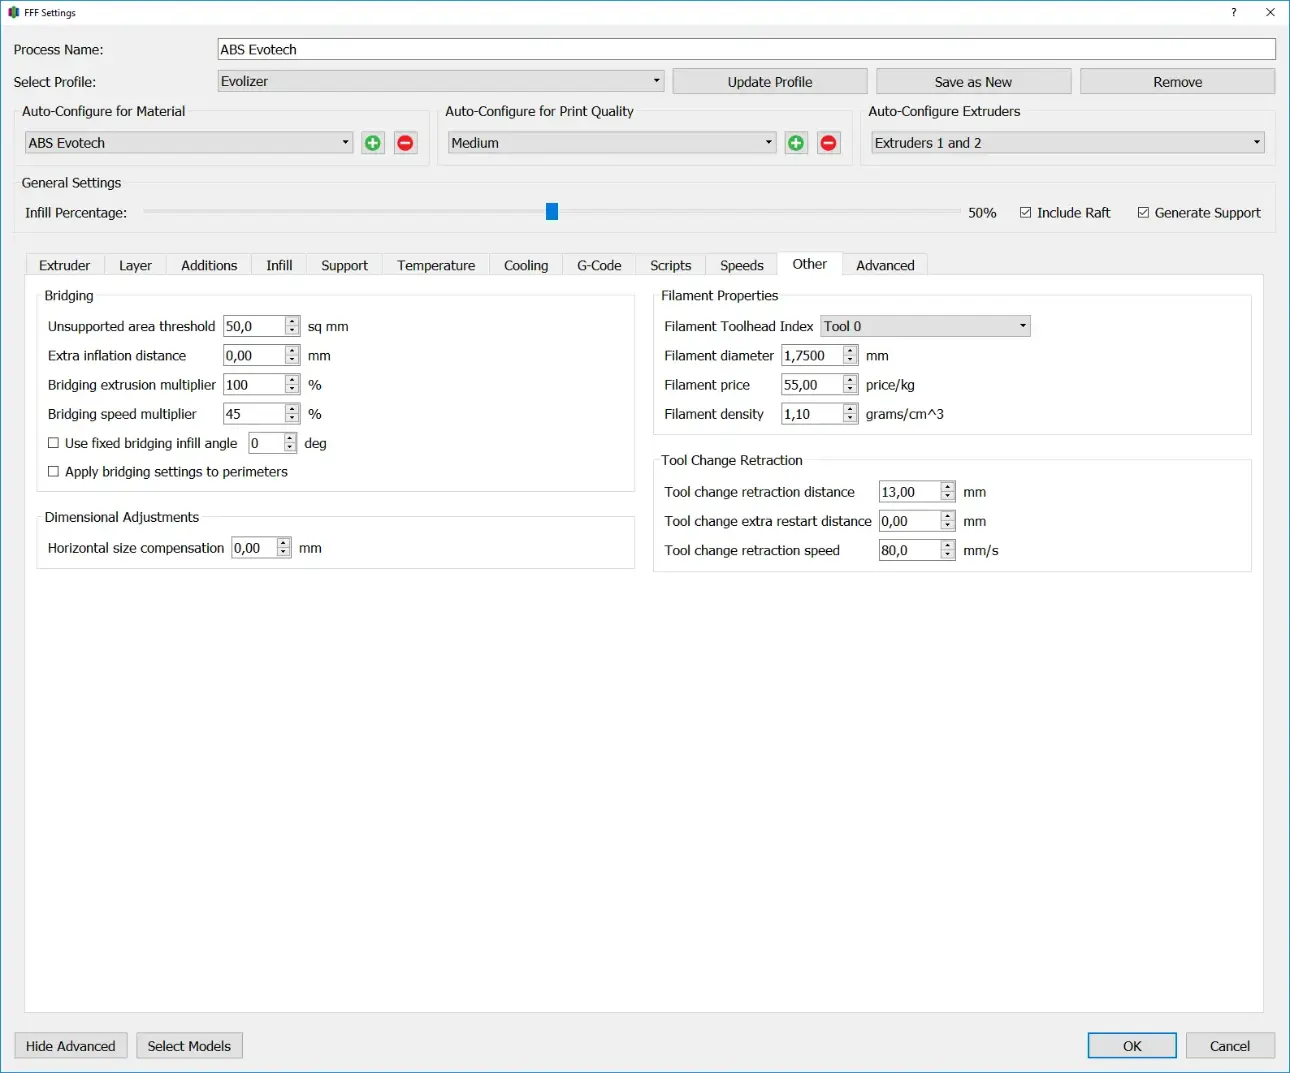
Bridging
Bridging means that a horizontal line is printed between two fixed structures without a support structure. The plastic thread is stretched between two fixed points by the print head, usually with adjusted extrusion and speed settings. Bridging settings depend largely on the design of the printer and the material used.
Unsupported Area Threshold
The Unsupported Area Threshold specifies the area of the overhang from which the bridging settings take effect.
Extra Inflation Distance
Specifies how far the bridge overlaps with the fixed structures. Higher values produce stronger connections, which is particularly necessary for rapidly shrinking materials.
Bridging extrusion multiplier
The Bridging extrusion multiplier indicates how much material is used when creating bridges compared to normal extrusion.
Bridging Speed Multiplier
The bridging speed multiplier indicates how quickly the bridges are printed compared to the default printing speed.
Use fixed bridging infill angle
This checkbox can be used to specify the angle to the X-axis at which the infill for all bridges will then be printed. Simplify3d then no longer decides itself which angle is best suited for the respective bridge, but rather uses the one set here.
Apply bridging settings to perimeters
With this checkbox the settings for bridges can also be applied to the perimeters of the bridges. By default these are not used on the perimeter of the bridges but only for the infill.
Dimensional Adjustments
Horizontal size compensation
Using horizontal size compensation, the tolerances of the 3D printed model can be adjusted in the xy direction. 3D printed objects tend to be slightly larger on the outside, while holes and recesses tend to be slightly smaller. If you simply scaled the object to avoid this effect, the distance between two holes would change, for example. Horizontal size compensation, on the other hand, only changes the position of the outer line, meaning that the distances inside the component remain unchanged.
Filament Properties
Simplify3d offers the possibility to calculate material costs and component weight. The filament data can be entered in this area. After calculating the G code, the results can be read in the top left area.
Filament Toolhead Index
Indicates which printer extruder has the filament loaded.
Filament diameter
Indicates the nominal diameter of the filament. This setting is also responsible for calculating the feed, as it is included in the volumetric calculation.
Filament price
Indicates the price per kilogram of filament.
Filament density
Indicates the density of the material used.
Tool Change Retraction
In this area you can make settings for the retract when changing tools. When using multiple nozzles, it is recommended to withdraw the filament from the heating zone of the unused nozzle. This is necessary because if the filament remains at high temperatures for too long, thermal degradation and the nozzle can become clogged.
Tool change retraction distance
Specifies the distance the filament is retracted from the passive nozzle when changing tools. This should be chosen so large that the filament is safely pulled out of the heating zone. However, when using a direct extruder, care must be taken not to pull the filament back past the feed unit.
Tool change extra restart distance
Specifies the additional distance the filament is advanced in the active nozzle after the tool change. This is done to compensate for material leaking from the nozzle while the nozzle was heated but not in use, while also building up enough pressure to achieve a clean first line starting point.
Tool change retraction speed
Specifies the speed at which the filament is pushed back and forth.